
The Ultimate Guide to Cleaning Gun with Portable Ultrasonic Cleaner
Owning a firearm comes with the responsibility of proper maintenance, and one crucial aspect of gun ownership is regular cleaning. Cleaning gun regularly is not only ensures its optimal performance but also prolongs its lifespan.
While various cleaning methods are available, using a portable ultrasonic cleaner has gained popularity for its efficiency and effectiveness in removing dirt, grime, and residues from gun parts.
Portable ultrasonic cleaners from brands like Sonic Soak can provide a thorough and efficient cleaning process. That’s because these devices use high-frequency sound waves to create microscopic bubbles in a cleaning solution.
This comprehensive article will explore step-by-step instructions for using a portable ultrasonic cleaner, discuss essential tips for maintaining the device, and highlight common mistakes to avoid during the cleaning process. So let’s dive in!
Understanding the Importance of Cleaning Gun

Gun cleaning is a crucial aspect of responsible gun ownership that should never be overlooked. Beyond the apparent reasons of maintaining a clean and aesthetically pleasing firearm, the significance of regular cleaning extends to the very core of firearm functionality and safety. A dirty or neglected gun can lead to malfunctions, misfires, and even hazardous accidents.
Regular cleaning not only ensures the reliable and accurate performance of your firearm but also prevents the accumulation of fouling and debris that can impede its functionality. Moreover, proper gun cleaning helps to preserve the firearm's value and appearance, making it a point of pride for every gun owner. Whether you are a seasoned gun enthusiast or a new firearm owner, understanding the importance of gun cleaning is fundamental to responsible gun ownership and ensuring your safety and the safety of those around you.
What is a Portable Ultrasonic Cleaner?
A portable ultrasonic cleaner is a cleaning device that uses ultrasonic waves to remove contaminants from various objects, including gun parts. The cleaner consists of a tank filled with a cleaning solution and generates ultrasonic vibrations that create microscopic bubbles. These bubbles collapse, creating a scrubbing action known as cavitation, which dislodges dirt and grime from the gun's surfaces.
Advantages of Using a Portable Ultrasonic Cleaner
Using a portable ultrasonic cleaner for gun cleaning offers several advantages. Firstly, it provides thorough cleaning, even in hard-to-reach areas that may be challenging to clean using traditional methods.
Secondly, it reduces the need for extensive manual scrubbing, saving time and effort. Additionally, the gentle cleaning action of the ultrasonic waves ensures that delicate gun parts are not damaged during the process.
How to Choose the Right Portable Ultrasonic Cleaning Machine for Your Gun?
When selecting a portable ultrasonic cleaner for gun cleaning, there are a few key factors to consider. First, ensure the cleaner's tank size is sufficient to accommodate the gun parts you intend to clean.
Next, check the frequency and power of the ultrasonic waves, as higher frequencies and power levels typically result in better cleaning performance. It's also essential to choose a cleaner with adjustable temperature settings and a timer for better control over the cleaning process.
Step-by-Step Guide to Cleaning Your Gun with a Portable Ultrasonic Cleaner
Cleaning your gun with a portable ultrasonic cleaner involves several steps for optimal results. Follow this comprehensive guide:
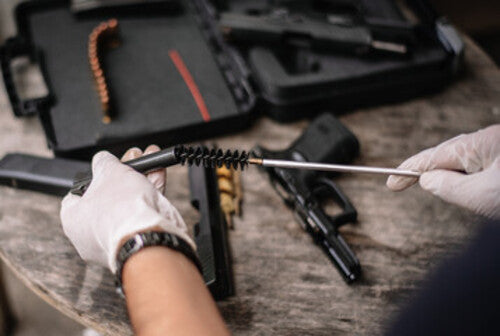
Step 1: Unloading and Safety Precautions
Before starting the cleaning process, ensure that the gun is unloaded and that there is no ammunition in the vicinity. Disengage the firearm's magazine and visually inspect the chamber to verify that it is empty. Wear appropriate safety gear, such as safety glasses and gloves, to protect yourself during the cleaning process.
Step 2: Disassembling Your Gun
Disassemble your gun according to the manufacturer's instructions. Separate the slide, barrel, frame, magazine, and any other removable parts. Refer to your gun's manual if you need assistance with disassembly.
Step 3: Preparing the Ultrasonic Cleaner
Place the portable ultrasonic cleaner on a stable surface in a well-ventilated area. Fill the tank with an appropriate cleaning solution, following the manufacturer's recommendations for the correct dilution ratio.
Step 4: Choosing the Right Cleaning Solution
Select a cleaning solution specifically formulated for ultrasonic cleaning. Avoid using solutions that may damage the gun's metal or plastic components. Read the product labels and ensure the solution is compatible with your firearm.
Step 5: Submerging the Gun Parts
Carefully place the disassembled gun parts into the ultrasonic cleaner's tank, ensuring they are fully submerged in the cleaning solution. Avoid overcrowding the tank, as it may hinder the cleaning process.
Step 6: Operating the Ultrasonic Cleaner
Turn on the ultrasonic cleaner and set the appropriate temperature and timer settings based on the manufacturer's recommendations and the cleaning solution used. Allow the eco friendly washing machine to run for the recommended duration to ensure thorough cleaning.
Step 7: Post-Cleaning Inspection
After the cleaning cycle is complete, carefully remove the gun parts from the ultrasonic cleaner. Thoroughly inspect each part for any remaining debris or residue. Use a soft brush or cloth to remove any stubborn dirt if necessary.
Tips for Maintaining Your Ultrasonic Automotive Parts Cleaner

To ensure that your portable ultrasonic cleaner continues to perform at its best and extends its lifespan, here are some additional maintenance tips to follow:
1. Inspect and Replace Cleaning Solution Filters
If your ultrasonic cleaner has filters to trap debris and contaminants from the cleaning solution, make sure to inspect them regularly. Clean or replace the filters as needed to prevent clogs and maintain efficient cleaning performance.
2. Calibrate Timer and Temperature Settings
Periodically check and calibrate the timer and temperature settings of your ultrasonic cleaner. Over time, these settings may drift, affecting the cleaning process's accuracy and efficiency.
3. Use the Right Cleaning Solution
Always use the recommended cleaning solution for your ultrasonic cleaner. Using the wrong solution can be ineffective and may damage the cleaner's components or the items being cleaned.
4. Avoid Overcrowding
When cleaning multiple items simultaneously, avoid overcrowding the tank. Ensuring sufficient space between items allows the ultrasonic waves to reach all surfaces and clean effectively.
5. Clean the Transducer Elements
The transducer elements are responsible for generating the ultrasonic waves. Regularly clean these elements to remove any buildup or debris that may affect their performance.
6. Check for Leaks
Inspect the tank and its seals for any signs of leaks. Leaks can lead to reduced cleaning efficiency and potential damage to the cleaner's internal components.
7. Follow Safety Precautions
Always follow the safety guidelines provided by the manufacturer when using and maintaining your ultrasonic cleaner. This includes wearing appropriate personal protective equipment and avoiding contact with cleaning solutions.
8. Perform Regular Maintenance Checks
Create a schedule for routine maintenance checks. This can include inspecting internal components, checking for loose connections, and ensuring all parts are functioning correctly.
9. Store the Cleaner Properly
When not in use, store your portable ultrasonic cleaner in a safe and dry environment. Keep it away from direct sunlight, extreme temperatures, and humidity.
10. Seek Professional Servicing
If you notice any issues with your ultrasonic cleaner that you cannot address yourself, or if it requires repairs, seek professional servicing. Attempting to fix complex issues without the proper expertise may lead to further damage.
Additional Cleaning Methods for Specific Gun Parts
While a portable ultrasonic cleaner is highly effective for general gun cleaning, some specific gun parts may require additional attention:
Cleaning the Barrel
The barrel is a critical component that requires thorough cleaning. Use a bore brush and gun cleaning solvent to remove fouling and residue from the barrel's interior. Follow up with cleaning patches until they come out clean.
Cleaning the Slide and Frame
The slide and frame can accumulate dirt and debris, affecting the gun's overall performance. Use a nylon brush and gun cleaning solvent to scrub these parts carefully. Wipe them down with a clean cloth afterward.
Cleaning the Trigger Mechanism
The trigger mechanism is a sensitive part that should be cleaned with precision. Use cotton swabs and a gun cleaning solvent to carefully clean the trigger, sear, and other small parts in this area.
Cleaning the Magazine
Disassemble the magazine and clean each component thoroughly with a brush and solvent. Pay close attention to the magazine spring and followers.
Common Mistakes to Avoid While Cleaning Your Gun

Even with the best intentions, gun owners may make mistakes during the cleaning process, leading to potential issues. Avoid the following common mistakes:
Using Improper Cleaning Solutions
Using harsh or abrasive cleaning solutions can damage the gun's finish and components. Stick to solutions specifically designed for gun cleaning and follow the manufacturer's recommendations.
Neglecting Hard-to-Reach Areas
Ensure you clean all parts of your gun, including difficult-to-reach areas. Neglecting these spots can lead to a buildup of fouling and affect the gun's performance.
Overlooking Rust and Corrosion
Inspect your gun for any signs of rust or corrosion regularly. Address these issues promptly to prevent further damage.
Inadequate Drying and Lubrication
After cleaning, thoroughly dry all gun parts to prevent moisture-related issues. Apply an appropriate gun lubricant to ensure smooth functioning.
Final Thoughts
Properly cleaning your gun with a ultrasonic cleaning machine is vital to responsible gun ownership. Regular maintenance ensures optimal performance, promotes safety, and extends the life of your firearm. By following the step-by-step guide and avoiding common mistakes, you can maintain your gun in top condition, ensuring reliable performance when it matters most.